Account Functions is probably the WHM section you will use the most as this is where the actual hosting accounts management takes place.

The Account Functions section includes the following options:
- Create a New Account – new hosting accounts are created using this menu;
- Force Password Change – allows you to force any cPanel user to change their password;
- Limit Bandwidth Usage – here you can change the bandwidth limit of a cPanel user;
- Manage account suspension – in that menu you can suspend and unsuspend hosting accounts;
- Manage Demo Mode – this feature allows you to convert any cPanel account on your server to a demo account.
- Modify an Account – you can modify existing hosting accounts using this option;
- Password Modification – allows you to change the cPanel password of any of your users;
- Quota Modification – you can change the disk space limit of a cPanel user from here;
- Skeleton Directory – the skeleton directory is /home/yourcpaneluser/cpanel3-skel/public_html where yourcpaneluser is your actual cPanel reseller username; you can use this directory to place the same file(s) into every new account’s public_html directory during account creation;
- Terminate Accounts – you can terminate/delete a hosting account from here;
- Upgrade/Downgrade an Account – allows you to change the package for an account;
- Web Template Editor – this tool allows you to create template pages that will appear to anyone who tries to load a site that has not yet been configured, is suspended, has moved, or is experiencing connectivity issues;
Now let’s create a new hosting account. To do this, click on the Create a New Account feature.
You will be taken to the account creation screen where you will have to fill in the details for the new account – domain, username, password, email, package, CGI access, theme, locale, DNS and mail routingsettings:
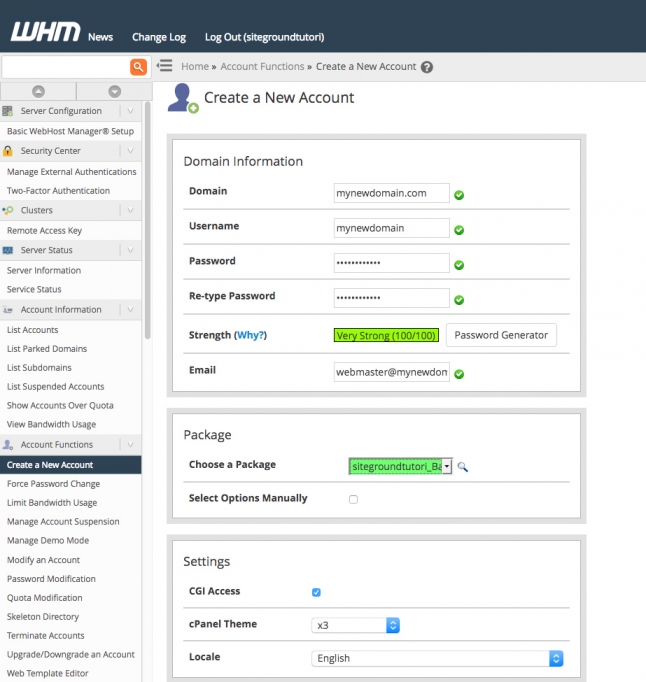
Most of the options are self-explanatory, but here are a few important things to note:
- The username cannot be longer than 16 characters; by default, cPanel takes the first 16 characters from the domain name and uses that as the username; this can be changed to something else, but you cannot change the username length.
- If you click the option Select Options Manually, you will be able to set custom resource options for the account (disk space quota, bandwidth, etc) and even save the new settings as a separate cPanel Package.
- If you want to configure the account to use the nameservers set at the domain registrar instead of setting the account with the local nameservers of the Cloud, tick the corresponding option in the DNS Settings section.
- The Mail Routing Settings define how the emails for that account will be managed – locally (by the mail server on the Cloud ), as a backup (emails will be accepted and held until a lower number mail server becomes available) and as a remote exchanger (emails will not be accepted locally and will be sent to the lowest MX record available for the domain). There is an automatic option for mail server detection, but for it to work the MX records for the domain must resolve correctly.
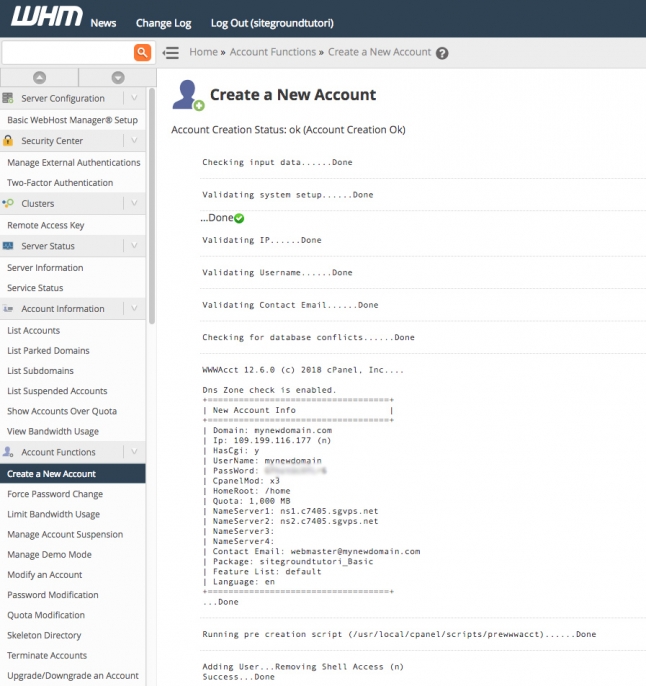
When you are ready to create your new hosting account, click the Create button at the bottom of the screen. If everything is OK, the account will be created successfully and you will see a summary of the new account info:
You can see all available accounts on your Cloud account by clicking the List Accounts option in the Account Information section on the left. In this section, you can also list all parked domains, subdomains, suspended accounts, and accounts over quota. There is a search option if you want to search through your accounts and an option to view the bandwidth usage of the accounts on the server.


