Outlook and all the other mail clients are great and useful but Gmail has a different feel to it and we have all used it for its multiple uses and perks. How about using it as a mail client, allowing you to only add one email to your smartphone and all your mail in one place. This tutorial will help you set up your private emails to Gmail from your Desktop so you can have all your mail on your favourite email provider.
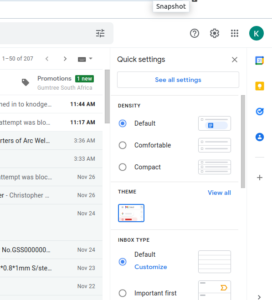
1. Log onto your Gmail account, select settings then click all settings to veiw all the available settings.
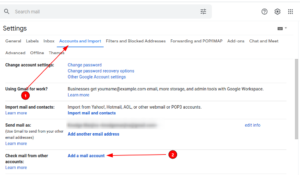
2. When the full settings page is up, select “Accounts and Import”. Here you will scroll to “Add mail account”, click on it for the pop up window that follows.
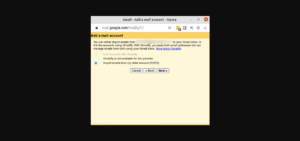
3. A separate pop up tab will be opened, here you will enter the email address you wish to add enter it in full. Click next then fill in the necessary details.
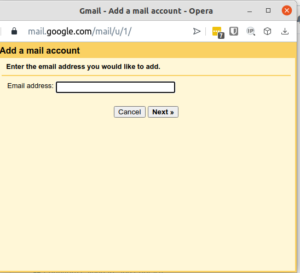
Gmail will ask if you wish to use Gmailify or POP3 but the former is not available for most accounts so select Next since, POP3 is the default option.
4. Enter the required details, with the username being your full email address, then the password to the email you entered above and the link to the mail server which is mail.yourdomain.com, where “yourdomain.com” represents your full domain name. For cPanel users, these details are provided in the welcome email you receive in the email account as soon as it is created.
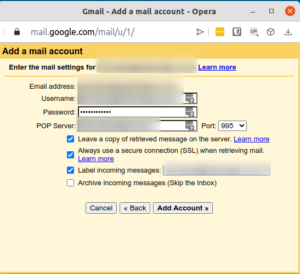
Note that Gmail only uses, POP so the port is 995, remember to also select the option to keep a copy of the email on the server and to add a label of the email so you are able to differentiate the mail in your inbox then select ‘Add Account’.
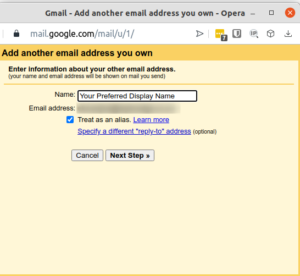
5. Once Gmail verifies your credentials, it will confirm and add your email account. It will then ask if you wish to also send mail from this account, the option is already selected so you click next if you wish to continue.
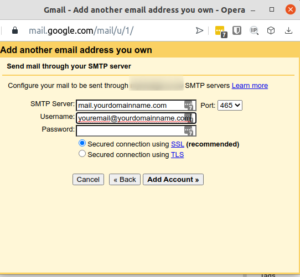
6. You will be required to enter your SMTP details, which are similar to the ones you entered earlier, the username being your full email address, then the password to the email you entered above and the link to the mail server which is mail.yourdomain.com, where “yourdomain.com” represents your full domain name. For cPanel users, these details are provided in the welcome email you receive in the email account as soon as it is created. Note that the port now is 465.
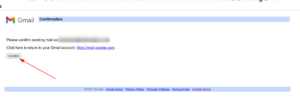
7. A verification email will be sent to the email account you can either, follow the link or add the code provided.
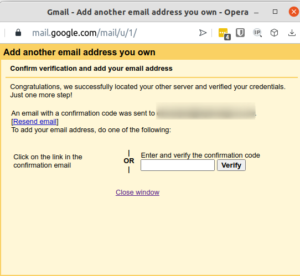
Once done, you have your domain-based email working in your Gmail account!